When I first browsed the new catalog I fell in love with the Nature’s Prints card samples. I just knew I would have to CASE them. The Nature’s Prints Stamp Set is part of the Sun Prints Suite. The Sun Prints Designer Series Paper is one of my favorites!!!

Summer got busy and I missed posting for a couple of weeks so going to make it up today. The blue stamped images used Starry Sky Ink, which is one of the new Stampin’ Up! 2022-2024 In Colors. I love that each year Stampin’ Up! comes out with new colors that are on trend.
Nature’s Prints Card Samples – card 1

Card base is Starry Sky Cardstock (5 1/2″ x 8 1/2 folded in half). Topped with some of the Sun Prints Designer Series Paper (fern print 4 1/4″ x 5″) and (gray 3″ x 4 1/4″). The words are stamped in Starry Sky Classic Ink and the elements in Starry Sky and Gray Granite. All the die cuts were cut out with the Natural Prints Dies and the Stampin’ Cut & Emboss Machine. Finishing of with three Opal Round embellishments.
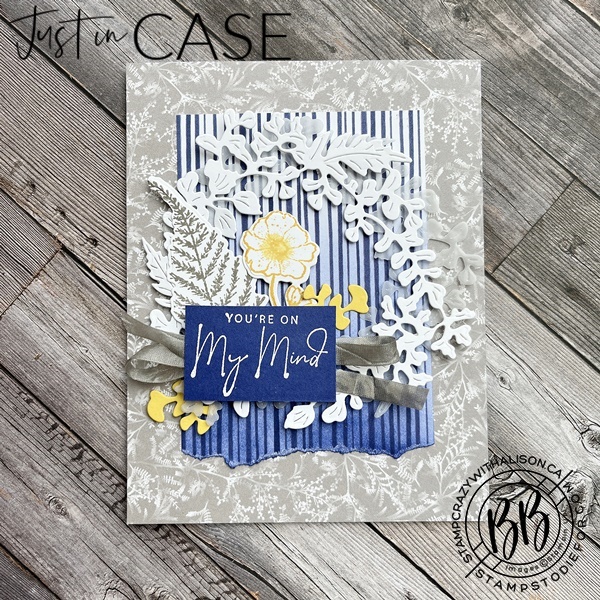
Nature’s Prints Card Samples – card 2

If I had to pick a favorite on page 90 of the samples it would be this card. Love the extricate die-cut wreath.
paper measurements
- Basic White (cardbase): 5 1/2″ x 8 1/2″ scored at 4 1/4″
- (wreath): 4 1/4″ x 4 1/4″
- (fern and flower): 2 1/2″ x 3″
- Cardstock Vellum (wreath): 4 1/4″ x 4 1/4″
- Starry Sky (words): 1 1/8″ x 1 3/4″
- Daffodil Delight (sprigs): 1 1/2″ x 2 1/2″
- Sun Prints Designer Series Paper (Gray Granite): 4 1/4″ x 5 1/2″
- (blue strips): 3″ x 4 1/2″
stamping Directions
- Fold the Basic White in half to create card base and glue the Gray Granite Designer Series Paper to the card front.
- Tear the bottom edge of the striped paper and with Blending Brushes add some Starry Sky Ink to the bottom and glue to the center of the card front.
- Die-cut the Cardstock Vellum and the Basic White with the wreath using the Stampin’ Cut & Emboss Machine and glue to the center of the cardfront.
- Stamp the fern in Gray Granite, the flower in Daffodil Delight and die-cut with the coordinating die and glue to the lower left-hand side of the wreath.
- Die-cut two springs in Daffodil Delight Cardstock and add to the lower left-hand side of the wreath.
- Color the Basic White Seam Binding with the Gray Granite Stampin’ Blends and run it back and forth on top of the stamped elements and secure with glue dots.
- Heat Emboss the words in white on the Starry Sky Cardstock and adhere over the seam binding with Stampin’ Dimensionals.
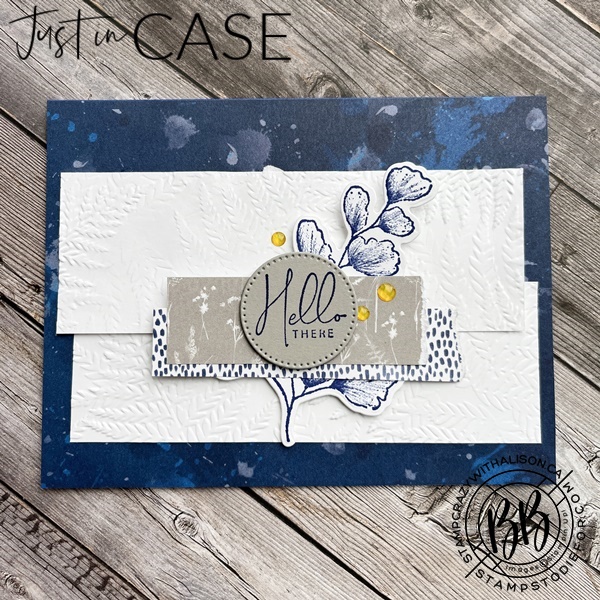
Nature’s Prints Card Samples – card 3

Starting with a Basic White Cardstock base ( 5 1/2″ x 8 1/2″ folded in half) I glued a piece of the Sun Prints Designer Series Paper ( 4 1/4″ x 5 1/2″) to the front. Embossing two Basic White Strips (1 3/4″ x 5″) of cardstock with the Fern 3D Embossing Folder to give the card some great texture. No card would be complete without stamping so I added a Starry Sky sprig to the center. Stamping the words and die-cutting them out using the Stylish Dies and popping it up on some strips of designer paper (gray 1″ x 3″ & blue 3/4″ x 3 1/2″.). Final touch was adding some Daffodil Delight Glossy Dots to the card front.
Stamping Supplies used on the three cards
")
")

 Designer Series Paper")


 Crinkled Seam Binding Ribbon")


")
FREE MoNthly pDF Tutorial
Every month my Border Buddy Alison Solven (CAN) and I create a PDF Tutorial. This month we featured the Circle Sayings Bundle. The Tutorial is a thank you gift we send to customers who place ANY SIZE ORDER at our online stores.
PDF TUTORIAL INCLUDES:
- Images
- Supply list
- Measurements
- Step-by-Step directions for 6 unique cards
check out all of our customer rewards
- Patsy’s Customer Rewards (US customers)
- Alison’s Customer Rewards (Canadian customers)
Would love to have you shop with us!
- Patsy’s Online Store (US customers)
- Alison’s Online Store(Canadian customers)
Thanks for visiting my blog today! Happy Stamping!
Current Host Code 69TADYNY


Leave a Reply