Today I will share step by step how to make this Fun Fold Easel Card. Each month I hand stamp a fun fold card and send it to the top ten in sales on my Diva & Dude Team. This was the July 2022 card.

I used the Trees for Sale Stamp Set and the Tree Lots Dies (free Sale-A-bration item). Unfortunately the dies were so popular that they ran out of them, SAD FACE! Mini Catalog and Sale-a-bration items are only while supplies last. If you ever see something in those publications you can’t live without order them ASAP! While you can’t get the little camper you will be able to make this fun fold card using other products.
fun fold easel card directions

Card paper measurements
- Old Olive (cardbase): 5 1/2″ x 8 1/2″ scored at 2 1/8″ & 4 1/4″
- (wreath): scrap
- Basic White (star paper backing): 3″ x 5″
- (trees): 2 1/2″ x 4 1/4″
- (camper): 2 1/4″ x 3″
- (string of lights): 1/2″ x 2″
- (words): 3/4″ x 3 1/4″
- Balmy Blue (camper trim):1 1/4″ 2 3/4″
- Poppy Parade (mat): 1″ x 3 1/2″
- (bow): scrap
- Celebrate Everything Designer Series Paper (stars): 3″ x 5″
- (curtains): scrap
stamping directions
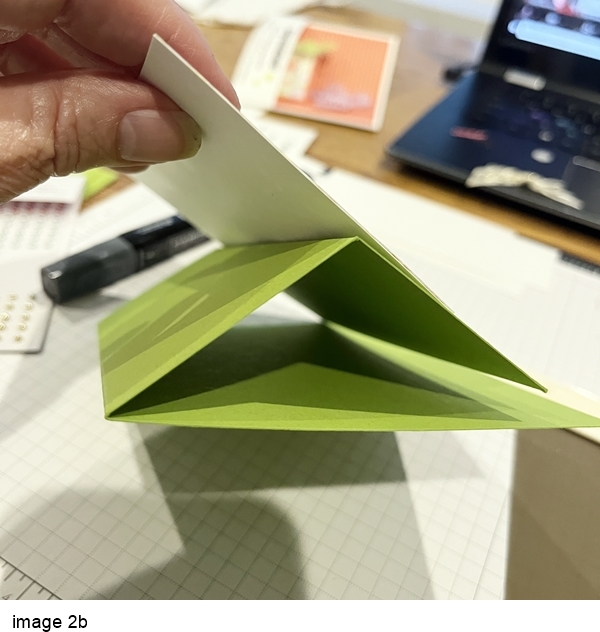
- Fold the Old Olive paper on the scored marks (I use a bone folder to rub across the fold to create nice crisp creases). The 2 1/8″ score mark with be your card front.
- Glue the star paper to the Basic White (this is to give the designer paper more stability.
- Add glue to just below the score mark on the front of the card base (as shown in image 1 below).
- Adhere the star paper to the card front about 1 1/4″ from the bottom (as shown in image 2a & 2b below).
- Stamp a large, medium and small tree using Old Olive Ink (off stamping once).
- Then stamp the tree pine bows with Old Olive Ink on top of the solid trees and cut out with the coordinating dies and the Stampin’ Cut & Emboss Machine.
- Adhere the trees to the card front as shown.
- Die-cut out the camper in Basic White.
- With Stampin’ Blends color the windows in Daffodil Delight, tire in Basic Black.
- Stamp the string of lights in Tuxedo Black Ink and die-cut and glue to the top of the camper.
Die cut the remaining… - Camper Trim in Balmy Blue and glue to the top and bottom of the camper.
- Curtain in scarp of designer paper and adhere to the top of the window.
- Wreath in Old Olive and glue below the door window.
- Bow in Poppy Parade and glue to the top of the wreath.
- Add some Festive Pearls to the string of Lights.
- Stamp the words on Basic White Paper with Tuxedo Black Ink.
- Glue the words to the Poppy Parade mat.
- Adhere the mat to the inside of the card about 3/4″ from the bottom edge with Stampin’ Dimensionals (this is what will hold your easel.


I hope you have fun making and easel card of your own. And don’t forget if you have any of the Sale-a-bration items on your list order ASAP!
The POOL PARTY & SOFT SEA FOAM CARDS & ENVELOPES and the TREE LOT DIES from the Sale-a-Bration flyer are GONE!
sunday sketches ss083
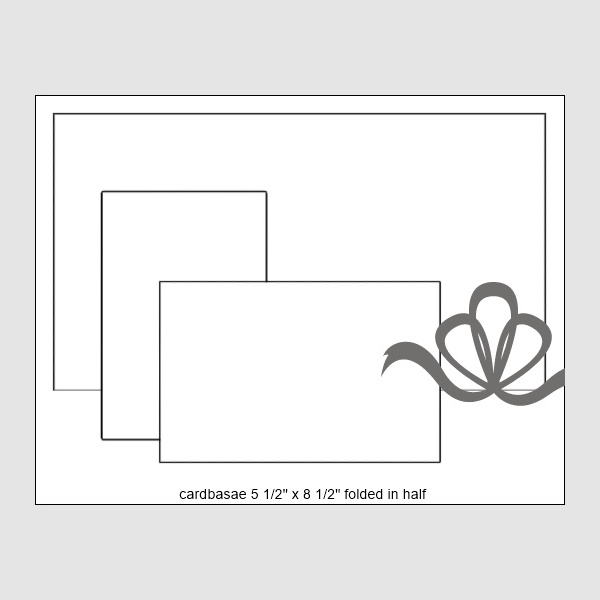
I used this card sketch for my layout of this week’s Sunday Sketch. I replaced the bow on the right with the small tree. Instead of a portrait rectangle on the left-hand side I used two trees. So while the layout is a starting place you can easily replace elements.
FREE MoNthly pDF Tutorial
Every month my Border Buddy Alison Solven (CAN) and I create a PDF Tutorial. This month we featured the Circle Sayings Bundle. The Tutorial is a thank you gift we send to customers who place ANY SIZE ORDER at our online stores.
PDF TUTORIAL INCLUDES:
- Images
- Supply list
- Measurements
- Step-by-Step directions for 6 unique cards
check out all of our customer rewards
- Patsy’s Customer Rewards (US customers)
- Alison’s Customer Rewards (Canadian customers)
Would love to have you shop with us!
- Patsy’s Online Store (US customers)
- Alison’s Online Store(Canadian customers)
Thanks for visiting my blog today! Happy Stamping!
Current Host Code 69TADYNY


Love what you did with your card, so very cute , I appreciate that you gave instructions on making it , much help for beginners , thanks a lot ,
Happy it was helpful – thank you so much for your note means a great deal.