Cup of Tea Stamp Set for today’s Sunday Sketch. Each Sunday I create a card using one of our card sketches.
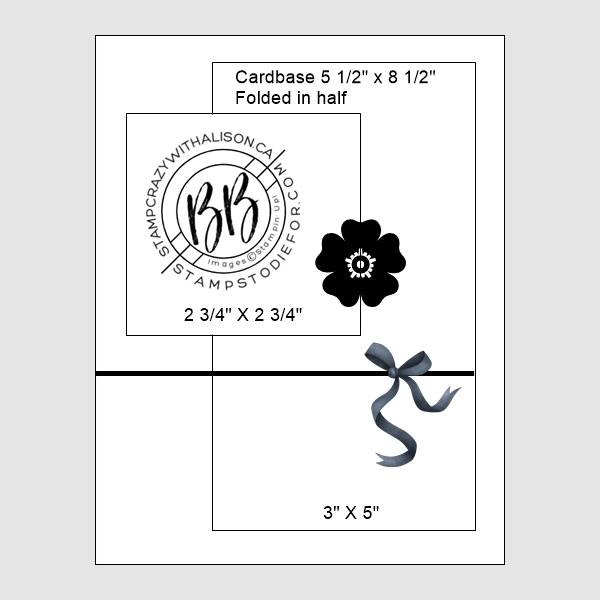

You can create a card exactly using the sketch layout or change it up a bit. You can see by the sketch and card I changed the square with a circle. The sketch is a starting point and you don’t need to follow it exactly. I omitted the ribbon around the cardfront. Let your imagination run wild!

Tea cups bring back wonderful memories of my mother’s collection. After her passing I kept about a dozen and when I host my afternoon friends I often use them. Does anyone collect teacups anymore?
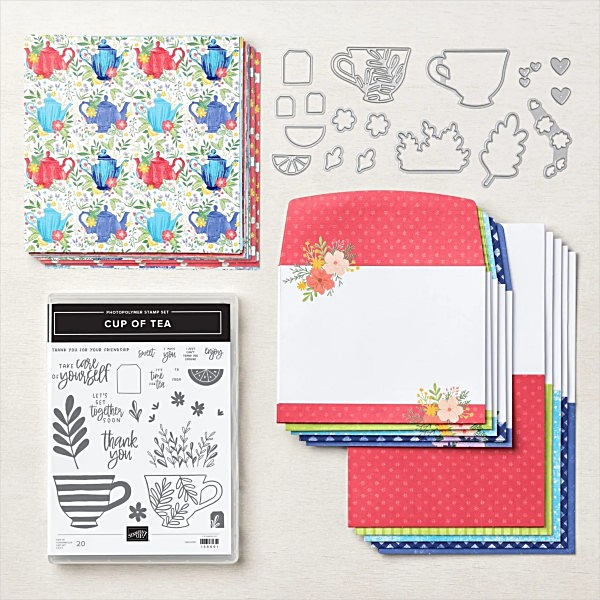


Cut of Tea Stamp Set is part of the Tea Boutique Suite which includes the coordinating Tea Cup Dies and the preprinted cards and envelopes. Saturday I will be sharing how I used the Santa Express Cards and Envelopes to create some quick and easy Christmas Cards. The precut, printed, scored and matching envelopes make card making a breeze.
Cup of Tea Stamp Set Card
paper measurements
- Basic White (cardbase): 5 1/2″ x 8 1/2″
- (tea cup): 3″ x 3″
- (stitched circle): 3″ x 3″
- (leaves): 2 1/2″ x 2 1/2″
- (flowers): 1 1/2″ x 3″
- (tag): scrap
- Tea Boutique Designer Series Paper (background): 4″ x 5 1/4″
- (tea cups): 2 1/2″ x 4 3/4″
step by step card directions
- Score the Basic White at 4 1/4″ and fold in half to create card base.
- Glue the background designer paper to the card front.
- Adhere the tea cup paper to the right-hand side of the cardfront about 1/2″ from the edges.
- Die cut the stitched circle from the Stylish Shapes dies using the Stampin’ Cut & Emboss Machine.
- With Stampin’ Dimensionals adhere the circle to the left-hand side of the card about 1″ from the top edge and 1/4″ from the left-hand edge.
- Stamp the striped teacup in Poppy Parade Ink and die cut with the coordinating die from the Tea Cup Dies.
- Use Garden Green Ink to stamp the leaves and and Crushed Curry Ink to stamp the flowers and die cut them out with the coordinating die.
- Glue the tea cup, leaves and flowers to the stitched circle.
- Stamp the words in Starry Sky Ink and die cut with the tiny tea tag.
- With a glue dot attach the Basic White Bakers Twine to the backside of the tag and tuck the other end under the top of the teacup.
I hope you found some inspiration here today.
Want More?
Alison is great at doing a Facebook Lives on our Facebook Group!
Hop over to our Border Buddy Hangout Facebook Group and check it out.
Not a member? Ask to join!
Would Love to have you shop with us!
• Patsy’s Online Store (US customers)
• Alison’s Online Store (Canadian customers)
Thanks for visiting my blog today! Happy Stamping!
Current Host Code 69TADYNY


Leave a Reply